


Top-Tier Dead Rails Classes Ranked: Horse Edition
If you're eager to explore the vast world of Dead Rails and achieve impressive distances without succumbing to death, you're in good company. Choosing the right class is crucial, alongside the gear you purchase and the companions you select. To save you from endless trial-and-error, I've put together this comprehensive Dead Rails class tier list. It's designed to guide you through the game's complexities, ensuring you make informed choices without the hassle.
Recommended Videos
Table of contents
All Dead Rails Class Tier List S Tier Dead Rails Classes A Tier Dead Rails Classes B Tier Dead Rails Classes C Tier Dead Rails Classes D Tier Dead Rails Classes
All Dead Rails Class Tier List
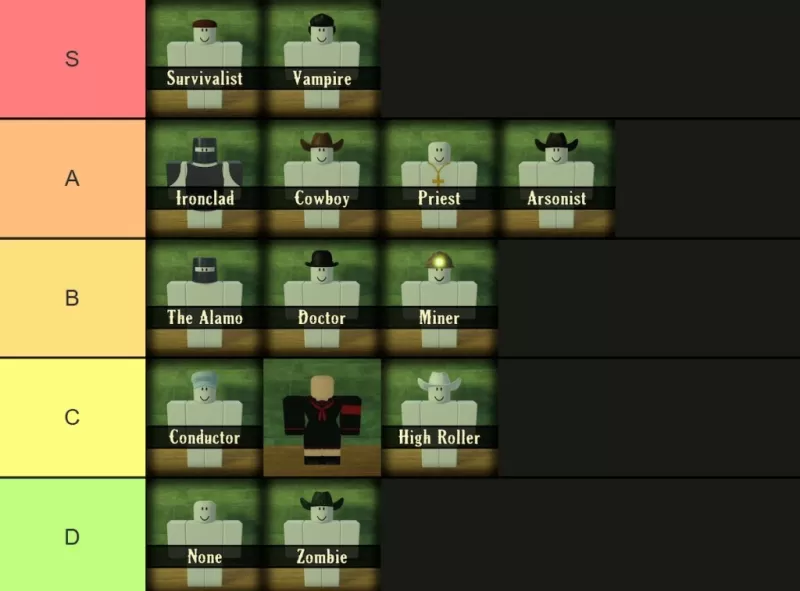
This Dead Rails class tier list might stir some debate, but that's the nature of the beast. The Vampire remains an unbeatable choice, even after numerous updates. Meanwhile, the Survivalist has surged ahead recently. It's disappointing to see the Zombie class still underperforming, unable to use Snake Oil. Team dynamics play a role too, though it's a minor factor. Remember, the goal is to enjoy the game with friends, not just to optimize every detail.
S Tier Dead Rails Classes
The S Tier is all about raw power and efficiency. The Survivalist and Vampire are the standout performers here, delivering unmatched damage and unique advantages. While the Ironclad has its merits, these two classes dominate:
| **Name** | **Cost** | **Info** |
| Survivalist | 75 | The Survivalist starts with a Tomahawk and becomes more lethal as your health decreases. Even at full health, you deal more damage than other classes, though a nerf might be on the horizon. It excels against tough enemies, delivering a punch that few can match. |
| Vampire | 75 | The Vampire is built for speed and aggression, outpacing even sprinting zombies. With a melee attack that can down most zombies in three hits, it's a force to be reckoned with. The downside is vulnerability to sunlight, but the Vampire Knife heals you with each successful hit, making sustained combat key to survival. |
A Tier Dead Rails Classes

The A Tier includes classes that are still excellent but might not match the S Tier in solo survival scenarios. They offer strong damage and starting gear, though they shine brightest in team settings. The Ironclad holds the most promise here:
| **Name** | **Cost** | **Info** |
| Ironclad | 100 | The Ironclad is outfitted with full armor, making you significantly harder to kill but slightly slower. Not ideal for solo play, it excels in team scenarios, particularly with shotguns for close-quarters combat. |
| Cowboy | 50 | The Cowboy offers a strong start with a revolver, ammo, and a horse. This setup makes early fights easier and provides the mobility to survive chaotic situations, especially during Blood Moon nights. With the Game Pass, selling the revolver can fund an even better initial loadout. |
| Priest | 75 | The Priest wields Crucifixes and Holy Water, which are powerful against enemies but cannot be sold. Immune to lightning, the Priest is invaluable in larger teams, providing crucial support with their throwables. |
| Arsonist | 20 | The Arsonist is perfect for chaotic scenarios, equipped with Molotovs and enhanced fire damage. Ideal for clearing out groups of enemies quickly, especially in confined spaces, and even more effective with a horse for hit-and-run tactics. |
B Tier Dead Rails Classes
B Tier classes are specialists, shining in specific situations. The Doctor offers great support at a low cost, though it's not ideal for solo damage dealing. These classes are essential in team play:
| **Name** | **Cost** | **Info** |
| The Alamo | 50 | The Alamo is designed for fortification, starting with Sheet Metal, Barbed Wire, and a helmet. It's perfect for securing the Train and holding off enemy waves, making it invaluable in high-pressure situations. |
| Doctor | 15 | The Doctor provides essential healing and can revive teammates at the cost of half their health. One of the most affordable classes, it's a game-changer in group play. Selling bandages and snake oil can net you a $40 boost at the start. |
| Miner | 15 | The Miner is ideal for resource gathering and nighttime exploration. With a helmet for visibility and a Pickaxe that quickly breaks ore, it's the fastest at collecting materials. While not combat-focused, its utility is unmatched. |
C Tier Dead Rails Classes
C Tier classes offer good utility but are less effective in solo scenarios. The Conductor is nearly essential in larger groups, while the Horse class adds a fun twist, albeit with limited practical use:
| **Name** | **Cost** | **Info** |
| Conductor | 50 | The Conductor controls the Train's speed, starting with Coal and reaching up to 84 speed. Lacking a melee weapon at spawn, they need protection early on. Their role in keeping the team mobile is crucial, and they're now less fragile than before. |
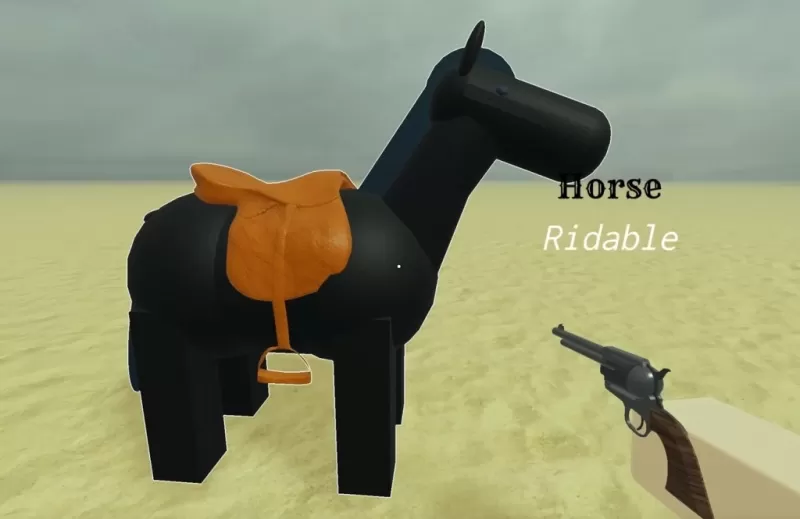
| Horse | Unlockable through the Horsing Around gamemode | The Horse Class transforms you into a horse, unlocked via the 2025 April Fools event. With standard horse stats and no passive healing, it's a novelty class that can ride other players but struggles in tight spaces. |
| High Roller | 50 | The High Roller earns 1.5x money from bags, providing a quick cash boost. However, it's more susceptible to lightning strikes during storms, embodying a high-risk, high-reward approach. |
D Tier Dead Rails Classes
The D Tier includes classes with little to offer in terms of advantages. The None class is a good starting point for beginners, while the Zombie class remains underpowered:
| **Name** | **Cost** | **Info** |
| None | Free | The None class is the default, starting with just a shovel and relying on scavenging. It's perfect for beginners to learn the game's basics without any perks or drawbacks. |
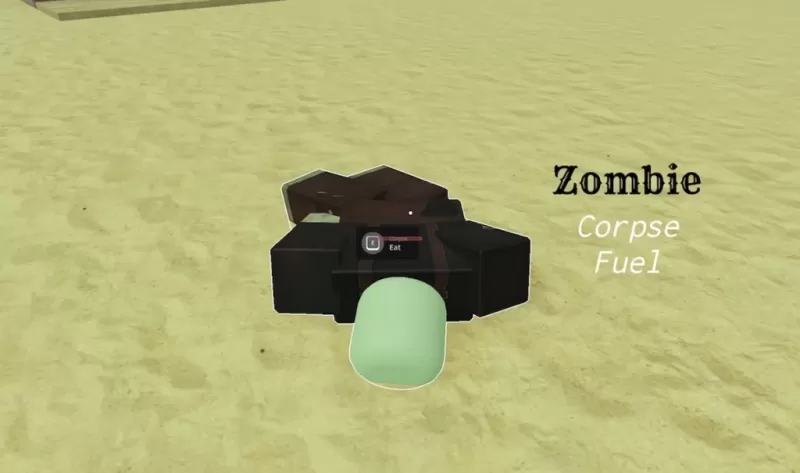
| Zombie | 75 | The Zombie can heal by feeding on corpses and has stealth advantages. However, it lacks access to Bandages or Snake Oil, making it currently underpowered despite its unique traits. |
That's the end of my Dead Rails class tier list! I hope it helps you break records and tackle mobs with ease. Be sure to use Dead Rails codes and explore Dead Rails challenges to stay ahead. Who knows what surprises the next update will bring?
-
 Feb 08,25GTA 5: Guide to Acquiring Formal Attire In Grand Theft Auto 5, after assisting with the Jay Norris assassination, players must change into a smart outfit before proceeding with Lester's next mission – a reconnaissance job at a high-end jewelry store. This guide explains how to acquire appropriate attire. Utilizing Michael's Existing Ward
 -
May 27,25Chimera Clan Boss Guide: Top Builds, Masteries & Gear for RAID: Shadow Legends RAID: Shadow Legends continues to push the envelope with its updates, and the Chimera Clan Boss stands out as the pinnacle of PvE challenges. Unlike the straightforward, power-centric battles of traditional Clan Bosses, Chimera demands adaptability, precise turn management, and an understanding of i
-
 May 23,25"2025 Laptop Buying Guide: Best Times for Deals" Laptops are a significant investment, but you can ease the financial burden by timing your purchase to coincide with the best deals. While new models are constantly hitting the market, certain times of the year offer more affordable options, even for the latest models in 2025. With President's Day s
 -
 Feb 02,25Pokemon GO Fest 2025: Dates, Locations, and Event Details Get ready for Pokémon GO Fest 2025! Niantic has announced the dates and locations for this year's in-person events earlier than usual, allowing ample time for planning. Pokémon GO Fest 2025 Dates and Locations: Niantic has confirmed three locations for GO Fest 2025, all in June: Osaka, Japan: May